This post contains affiliate links. If you grab one of the printables I recommend, I may earn a small commission at no extra cost to you.
Two free hours. That is what I had last Saturday, because my husband loaded both kids into the car for swim lessons and the house went so quiet I could hear the refrigerator. I reheated my coffee twice, stood in the living room, and decided it was getting fall decor that day. Not someday. That day, with whatever was already in the house.
So this list is different from my usual roundups. Every file below is a project with steps and an honest time next to it. When I say an hour with drying, I mean an hour, with drying, done by a tired person in slipper socks. No special skills. One file wants a cutting machine and I will tell you exactly when, and also how I cheated with scissors.
All of these came from an indie design shop and ran through my ancient inkjet without drama, mostly. Quick housekeeping: some links here are affiliate links, so if you grab a file I might get a small cut at no cost to you. That is the whole disclosure. Grab your scissors.
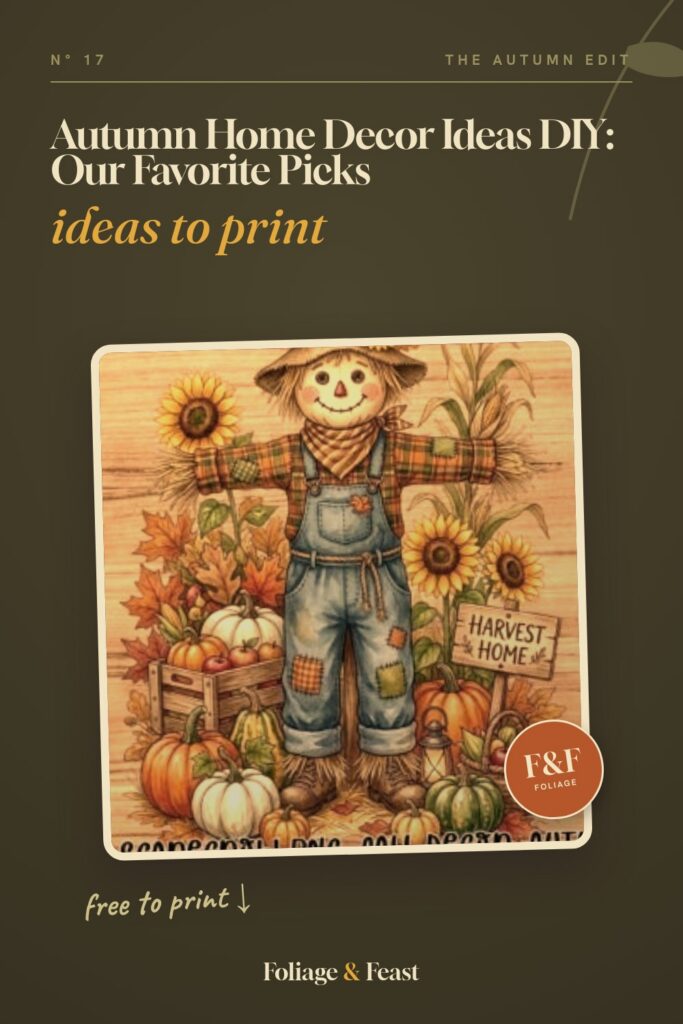
The Twenty-Minute Scarecrow Door Greeter

Steps: print him at 8×10 on 110 lb cardstock, rough-cut around the outline, glue him to a piece of flattened shipping box for a stiff back, trim again, prop him on the bench by the front door. Twenty minutes, no drying wait if you use tape runner instead of wet glue.
My youngest named him Herbert before I had even trimmed the second shoulder, so he is apparently staying through November. The PNG has a transparent background, which makes the cutting forgiving, since there is no printed box edge to dodge.
One nitpick: if you scale him to fill a full letter page his hat goes slightly soft at the brim. He is sharpest at 8×10 or smaller. Herbert does not mind. I did, a little.
A Watercolor Triptych in One Hour, Frames Included

This was the project I did first with my two quiet hours, and it took one of them. Steps: pick three images from the set that share a color story, print each at 5×7 on matte cardstock, drop them into three frames you already own, hang them in a row in the hallway. The printing and framing took maybe twenty minutes. The other forty went to moving the middle nail three times.
The set leans amber and ochre with soft edges, and three of them in a line read like something you paid a real person to paint. My sister asked where I bought them. I let her believe things.
Nitpick: watercolor washes drink ink. On my printer’s normal setting they came out pale and sad. Switch to best quality and let each sheet sit a minute before you grab it, or you will thumb-smudge a corner like I did on print number one.
Wreath Medallion Banner for the Mantel, Forty Minutes
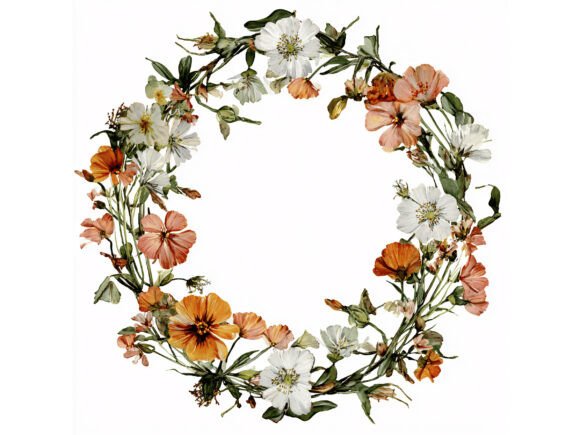
Fourteen wreaths is too many to frame, so I turned them into a banner. Steps: print two wreaths per page so each lands around 4 inches, cut out eight of them, punch a hole at the top of each, thread them onto jute twine, drape across the mantel. Forty minutes, and thirty of those are cutting.
The florals in this set are dense and painterly, so even a wobbly scissor line disappears into the design. I alternated the rusty ones with the paler ones and the rhythm carried the whole fireplace wall.
Nitpick: these are JPGs, so every wreath sits on a white background and you cannot cut every scallop and stem unless you hate yourself. I left a thin white halo around each one. From the couch you cannot tell. From two feet away you can. Nobody stands two feet from my mantel.
The 3D Paper Wreath, Two Honest Hours With Drying
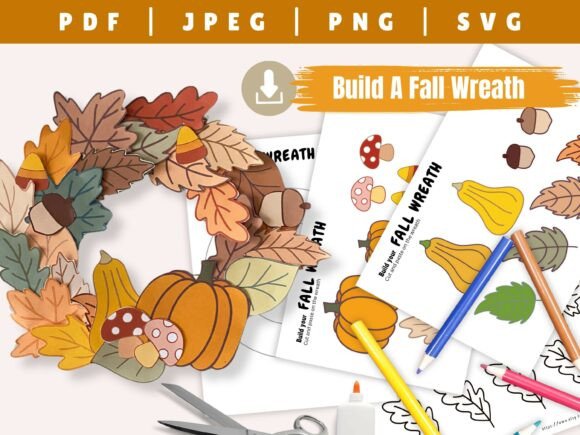
This is the one real craft on the list, an SVG designed to be cut and layered into a dimensional wreath. Steps: cut the pieces (machine if you have one, sturdy scissors if you do not, I did half and half), curl the leaf tips over a pencil, glue the layers onto the base ring working from the outside in, then let it dry before hanging. Two hours total. Not one. Two.
Here is my cheat: I do not have glue patience, so I held the hair dryer on the cool setting over each glued layer for thirty seconds before adding the next. Shaved the whole thing down to about ninety minutes and nothing slid.
Nitpick: the pieces come unlabeled, and once forty paper leaves are loose on your table they all look like cousins. Screenshot the finished-wreath photo before you start and keep it open. I learned this at leaf thirty.
Acorn Jar Luminary, Fifteen Minutes Flat

Fastest project here. Steps: print one of the acorn wreath designs on plain copy paper, and yes, plain paper on purpose, because thin paper glows. Trim it into a strip tall enough to wrap a clean glass jar, tape the seam at the back, drop in an LED tealight. Fifteen minutes, no drying, no tools past scissors and tape.
Lit up on the bookshelf at dusk, the acorns and oak leaves go all warm and shadowy, and it looks like far more effort than it was. I made a second one for the bathroom windowsill within the week.
Nitpick: the artwork is nearly square and a jar wants a wide strip, so you will crop some of the wreath top and bottom. Pick the design with the lightest background, too. The moodier ones swallow the glow and you just get a dim brown jar. Real tealights are a no, obviously. Paper.
One Big Wreath Print for the Entry, Ten Minutes
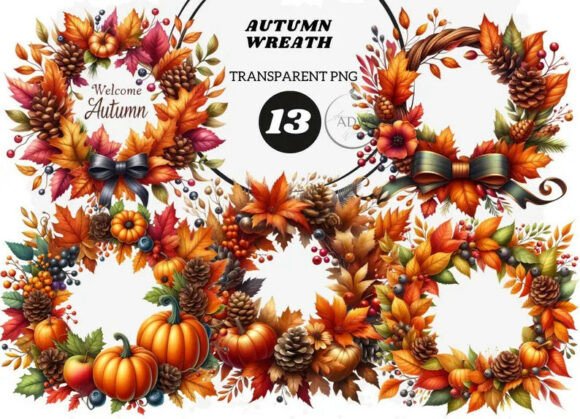
Not everything needs to be a production. Steps: print this single wreath at 8×10 on matte cardstock, put it in a frame, stand it on the entry table next to the key bowl. Ten minutes, and eight of those are your printer warming up and complaining.
What sold me is the restraint. One wreath, plenty of quiet space around it, rust and sage tones that do not fight with whatever chaos the entryway is already hosting. It anchors the table without asking anything of you.
Nitpick: the composition sits close to the edges, so a frame with a mat will bite into the outer leaves. I printed at 90 percent scale to buy back some breathing room and the mat behaved. Do that in the print dialog, not in a photo editor, and save yourself the fiddling.
Pumpkin Wreath Cards for the Tiered Tray, Thirty Minutes

My kitchen tray sat empty since spring, which felt like an accusation. Steps: print the pumpkin wreaths four to a page so each comes out card-sized, cut them into simple rectangles, no fancy contour cutting, back two of them with cardboard scraps so they stand, lean them into the tray tiers with a couple of small faux pumpkins. Thirty minutes.
Ten designs means you can rotate them weekly without reprinting, which is the closest my decor gets to a subscription. The rectangles look intentional, like little art cards, and rectangles are what a tired person cuts.
Nitpick: the oranges ran hot on my inkjet, more red than the listing photos. I nudged saturation down one notch in the printer settings and the second batch came out pumpkin instead of tomato. Test one page before you commit the good cardstock.
A Sunflower for the Kitchen Shelf, Twenty Minutes

Steps: print the sunflower wreath at 5×7, trim it, clip it to the wire shelf riser above my counter with a wooden clothespin, then stand back and decide it needed to move four inches left. Twenty minutes including the standing back.
Sunflowers walk a line, one wrong move and your kitchen is a 2012 farmhouse catalog, but this one keeps enough looseness in the petals to stay on the right side of it. Next to a stack of everyday plates it reads cheerful instead of themed.
Nitpick: the file is huge, which is lovely for quality and less lovely for my printer, which sat there spooling in silence long enough that I thought it had died. Resize a copy down to half before printing and it goes through without the drama. Keep the original for anything big.
Green Leaf Basket Tags, Thirty Minutes With Scissors

A palate cleanser, because by product nine your house may be entirely orange. Steps: print a page of the green leaves on cardstock, cut out six or eight of the big ones, punch a hole in each stem end, tie them to the pantry basket handles with jute. Thirty minutes, all of it cutting, none of it drying.
The greens here sit in sage and olive territory rather than summer green, so they read autumn without a single pumpkin in sight. My mom, who owns opinions about everything, called the baskets cute unprompted. That is a five-star review in her currency.
Nitpick: two of the leaf designs are near twins at printed size, so choose your spread on screen instead of printing the whole sheet blind. I ended up with three of what was functionally the same leaf and had to reprint one page.
The Leaf Garland, an Hour Plus Windowsill Drying

The finale, and the project my kids now claim they made. Steps: print two copies of the element sheets, cut out the individual leaves and mushrooms and acorns, glue each one to a length of twine at a slight angle so it looks scattered rather than filed, then let the whole thing dry flat. I laid mine along the kitchen windowsill, which is apparently a drying rack now, and hung it across the window frame an hour later.
An hour of work, honestly closer to seventy minutes if you cut carefully, plus the drying. Put on a show. The cutting is the whole job.
Nitpick: the elements come in wildly different sizes on the sheet, and some are too tiny to bother with for a garland. Print the pages with the biggest leaves twice and skip the small stuff, or you will be cutting acorns the size of your thumbnail out of spite. I was. It is not worth it.
Frequently Asked Questions
Is farmhouse decor going out of style?
The buffalo check and barnwood-sign version has cooled off, I will not pretend otherwise. But wreaths, sunflowers, and soft neutrals were around long before anyone nailed a shiplap accent wall, and they will outlast the backlash too.
My rule is one farmhouse note per room, not five. The sunflower print above works because it is alone on that shelf. Ten sunflower things in one kitchen is a theme party. One is taste.
Can I print these at home?
Yes, and everything in this article came off my own inkjet, which is old enough that it makes a noise I have chosen not to investigate. Cardstock in the 65 to 110 lb range for anything that stands or hangs, plain copy paper for the jar luminary, where thin is actually the point.
If your printer is out of commission, the library printer handles cardstock if you feed it through the manual tray, and most print shops will run a letter-size page for under a dollar. I have done the library run in pajama pants. No one blinked.
What file formats do these designs come in?
A mix. The wreath sets are JPGs, which print exactly as shown, white background included. The scarecrow and some clipart come as PNGs with transparent backgrounds, handy when you are layering or cutting close to the artwork. The 3D wreath is an SVG, which is a cut file rather than a picture.
For everything except the SVG, you just open the file and hit print like it is any photo. No special software, no learning curve on a Saturday afternoon.
Do I need a Cricut or Silhouette to use these?
For nine of the ten projects, no. Scissors, a hole punch, and tape cover you completely. The only file designed for a cutting machine is the 3D paper wreath, and even there I cut a good chunk of the pieces by hand while my machine handled the fussy ones.
If you have no machine at all, that wreath is still doable, just budget extra time and skip the tiniest detail pieces. Nobody audits the leaf count on a paper wreath. Nobody has ever audited mine.
Before You Print
By the time the swim bags hit the hallway floor, the triptych was hung, Herbert was on his bench, and the garland was drying on the windowsill. My husband looked around and asked if my mom had visited. I chose to take that as a compliment and I am still choosing.
Start with the jar luminary if you want a win in fifteen minutes, save the paper wreath for a day when you have two real hours and a full battery in your patience. The garland is still hanging a little crooked on the left side, by the way. I know. I see it every morning. It stays.